
I have been lucky to share a yard with a brilliant farrier who is also a great teacher. While I’ve never trimmed my horse’s hooves before, I had picked up a thing or two. However, nothing could prepare me for the task of trimming my own horse’s hooves for the first time. Luckily, I had my farrier on hand to explain every step of the process and help when I got stuck.
Learning how to trim your horse’s hooves is an intimidating prospect to many horse owners, and they often resort to drastic measures to “trim” hooves when a farrier is not available. Yes, I’ve heard some very misinformed horse owners state that you take a gallop on a tar road to “shorten them clompers.”
So, how do you trim your horse’s hooves? To start, make sure you have the right equipment. Next, check the distance between your horse’s heels, ensuring these will be at the same height when you finish trimming. Then remove the dead sole at the bottom of your horse’s hooves, as well as any overgrown parts of the frog, with the hoof knife. Reassess the length of the hoof nail compared to the heel height, then start your trimming line from the toe.
It may sound like a lot, but there’s more! Once you finish clipping the horse’s nail, you need to balance the nail and sole by rasping it accordingly. Once the hoof is level, double-check the heels, and then the fun part starts—removing flares and bulges. For this, you place your horse’s hoof on a supportive surface and check for any signs that the hoof bulges (making a concave line outward) or flares (making a convex line inward) with a “longer” part that grows away from the line of the hoof.
Sounds technical, right? It is. But, only a little more than cleaning their hooves. And, by the end of this article, you will be able to give your own horse’s hooves a fairly decent trim. Most importantly, you will have a horse that’s not footsore or lame from a poor trim.
The Right Equipment for Farrier Work
Tools maketh the man, or so the saying goes. Trimming your horse’s hooves for a “barefoot trim” requires the following tools (set on Amazon):
A Sharp Hoof Knife
While the double-bladed hoof knife is popular with some farriers, it has a severe downside—it increases the chances of you cutting yourself. There are hoof knives (on Amazon) available that are “right-handed” and “left-handed,” and having both is a great help for the different angles of the hoof.
Farrier’s or Workman’s Gloves
You may not be planning on cutting yourself with a knife, but the hoof nail becomes very sharp after you clip it. Simply brushing your hand across this can lead to nasty cuts. Select a glove type that allows you to grip the tools effectively and hold the hoof securely.
A 15-16 Inch Hoof Nipper
A hoof nipper is a vital tool. Some older farriers may happily cut the hoof nail with the hoof knife, but I don’t recommend it for a beginner. Hoof nippers (Amazon) are the best tool for the job. If you are only trimming one or two horses, you can opt for a cheap set. Should you want to do more horses, you may find it worthwhile to invest in a better quality set, but this also costs more.
A Hoof Rasp
Some DIY farriers neglect the hoof rasp, believing the horse can shape their hooves by walking. But, this is like driving your car and never balancing the tires. Your horse needs to have its hooves filed for correction and to prevent it from accidentally cutting itself. A hoof rasp (on Amazon) is essential for incidental repair too.
Farrier’s Apron
A farrier’s apron is a somewhat optional item, and it’s also a pretty pricey one. If you have a set of old jeans you can wear, and you only trim the occasional horse, then you can get away without one. However, the farrier’s apron (on Amazon) protects your legs from the rasp and blade slips. The apron also helps you grip your horse’s hooves with your thighs.
Alternatively, you can make your own DIY set by gluing some leather patches to an oversized set of jeans to offer you some protection and grip.
A Hoof Stool
When rasping your horse’s hooves, it is a great help to have a small stool they can rest their foot on. This would be a wood or metal stool (on Amazon), as shown in the images below. A plastic stool is likely to be a danger to you and the horse. The alternative is to skip leg day at the gym and have the horse rest their hoof on your leg.
Physically Exhausting Cost of Farrier Work
There are several steps to trimming your horse’s hooves. You may find that if this is your first time trimming, it is exhausting. To help you cope, never try to trim more than one horse in a day when you start. Even one horse may be too much, depending on your physical ability.
For farrier work, you will be standing in an awkward position that places a tremendous amount of strain on your back and thighs. To help, you can choose to trim one set of hooves one day and the other set the next. So, you may trim both front hooves today and the back hooves tomorrow. Never trim one front and one back hoof as this will cause severe strain to your horse’s ligaments.
Make Safety First a Priority
Be sure that you start your trimming work on a calm horse when you’ve never trimmed hooves before. Even then, have a reliable helper hold the horse to ensure they don’t suddenly spin or cow-kick.
Always have a halter on the horse, even if you work in a stable. Be sure to have enough room around you to work on the horse, with a ground area free from obstacles and away from walls or posts that may become dangerous should the horse move.
Never trim a horse in a crush pen or confined space, as this will leave you no room to avoid being kicked.
Steps to Trimming a Horse’s Hooves
When your horse doesn’t wear shoes, it means they are barefoot (as nature intended), but some horses do require shoes. Shoeing a horse is a delicate skill. Only an experienced farrier should do it, as you will be hammering nails into a very narrow line of insensitive tissue.
If you miss by even half a millimeter, you will cause your horse serious pain and cause damage. A barefoot trim, if done correctly, is something any horse owner can do.
There are several steps to trimming your horse’s hooves. Work slowly, take your time, and be sure to start early in the day, so you don’t run out of light. A first trim can take as much as an hour or more, so plan accordingly.
Step One: Visual Assessment
Appearances can be deceiving to the untrained eye. This hoof may look skew, but it is trimmed accurately. Because this horse has a slightly twisted hoof, it’s essential to keep her heels level, not the length of the hoof nail. This means her left side nail of this hoof is “longer” than the other to balance the hoof.
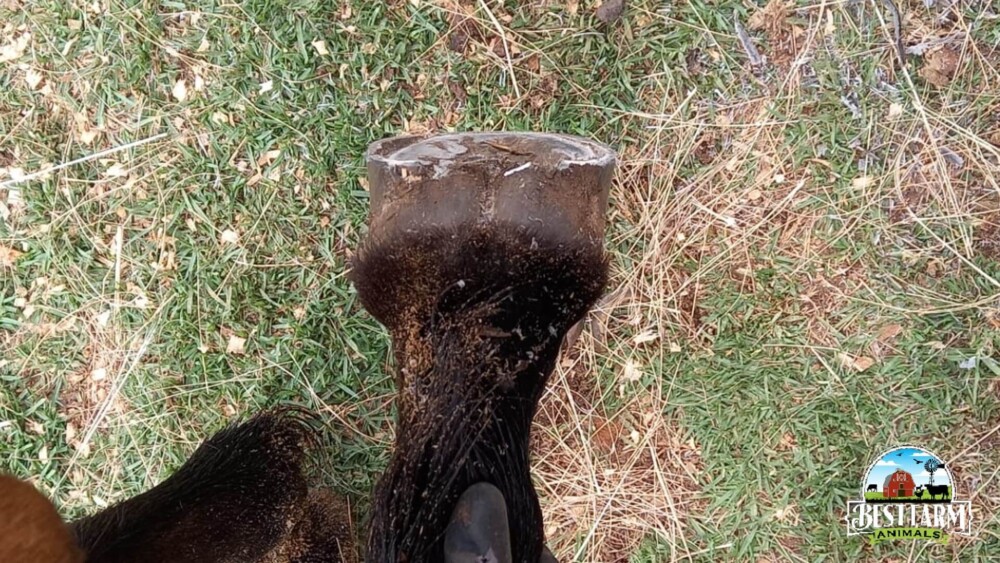
If we trim her nail to be level with the sole right through, she will turn her hoof even more skew and end up with serious problems. It all starts with a visual assessment.
Follow these steps when doing the first assessment before trimming the hoof:
- Look at the horse’s hooves when they are standing square over all four hooves.
- Notice the angle of the horse’s shoulder. This is the angle at which your horse’s hooves should follow.
- Lift the hoof you want to work on. Hold it carefully just behind the fetlock joint, letting the hoof hang free.
- Now pay attention to the heels. Are they the same height? No, then plan where you will do corrective work.
- How about the hoof quarter (the side nail of the hoof)? Are both at the same height? Remember that this may look strange due to the length of the nail compared to the opposite side nail. Both should be level and at the same height as the heels when you hang the hoof.
Step Two: Removing Sole and Frog Growth
Now you know what you need to trim and where you can begin to prepare the hoof. Using the hoof knife, cut away from your body, removing the crumbly bits of the hoof sole. It will come off with minimal effort, and the color changes will warn you if you are cutting too deeply.
The dead sole is a dark gray color or white if the hoof is white. The sole becomes white the deeper you cut and remove the dead sole (which is tricky on a white hoof).
Once you have removed the loose sole, you can use the hoof nippers to cut away any overgrown sections of the frog.
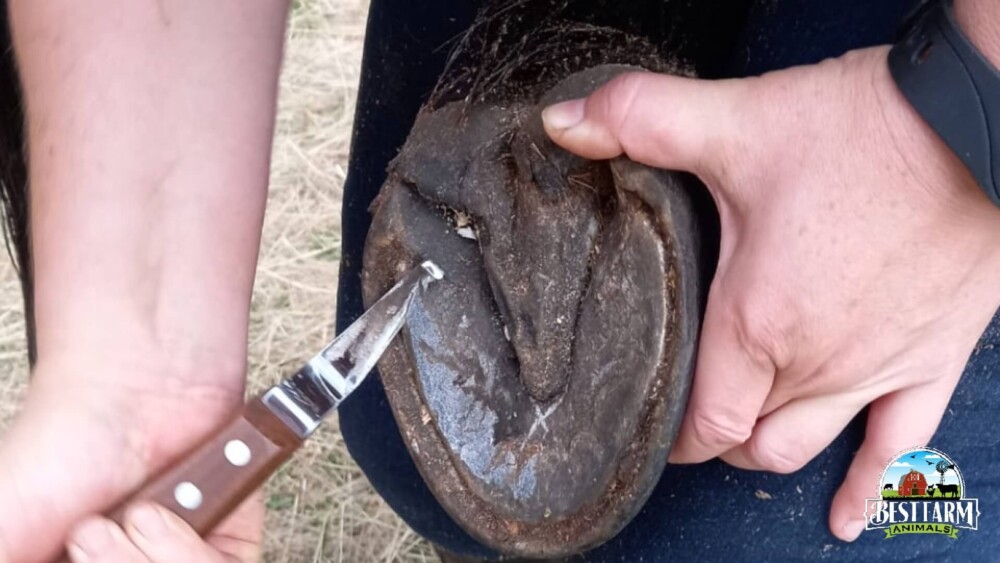
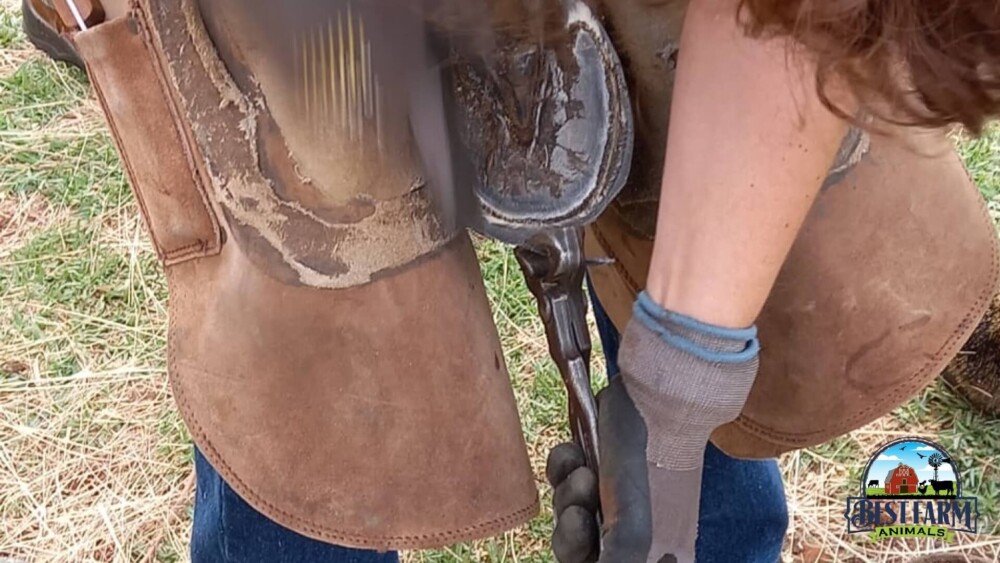
Here you can see the hoof being relieved of the dead sole. Notice the color changes between the sole being cut away and the live sole beneath. The following action is to clip the extra overgrown parts of the frog. In the photo, the “wings” at the tops of the frog need to be clipped.
Step Three: Deciding on the Trim Line
When you have removed all the excess sole, you can decide where to trim by looking at the toe area. This is usually the area that takes the most wear and tear of the hoof, so you know you can’t clip the hoof nail lower than this.
If it helps, you can draw the trim line with a permanent marker before you clip. This will allow you to trim with more certainty.
Step Four: Clipping
Below, the hoof nail is being clipped level with the sole at the toe. The outside nail is clipped level with the sole too, but the inside nail will be left several millimeters longer to keep the heels at the same height.
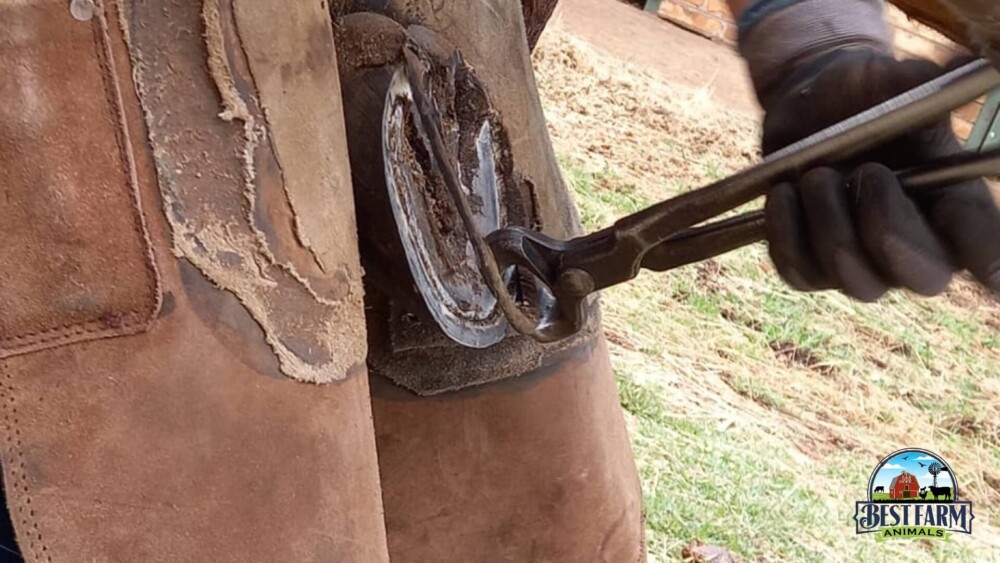
Note the angle of the hoof nippers. Be careful of tilting them outward, as this means you are clipping the nail incorrectly and reducing the horse’s load-bearing surface.
Next, you will be nipping the hoof nail to ensure it is the same width right around. Notice in the previous photo that the wall is thinner at the quarters than at the toe. This means you need to nip the toe at an angle to ensure the same wall thickness right around.
Notice the change in angle here. The hoof nippers went from being held in line with the sole to a 90-degree angle to the hoof sole. Reduce the thicker wall at the toe to match up with the thinner wall at the quarter. This is a big help when it comes to finishing the hoof later.
Warning: the sections of the hoof you are nipping here are very sharp, so wear gloves and sturdy boots when working with the hoof. Even one brush of your hand can lead to a bloody morning.
Step Five: Reassessing the Heel Height
Step five is a repeat of the first step. Again, assess the hoof, making sure it is cut vertically level when you hold the leg by the fetlock and let the hoof hang free.
Can you see a level surface from the heels down to the toe when the hoof hangs? Are the heels the same height? Great! Now you can begin to rasp the bottom of the hoof.
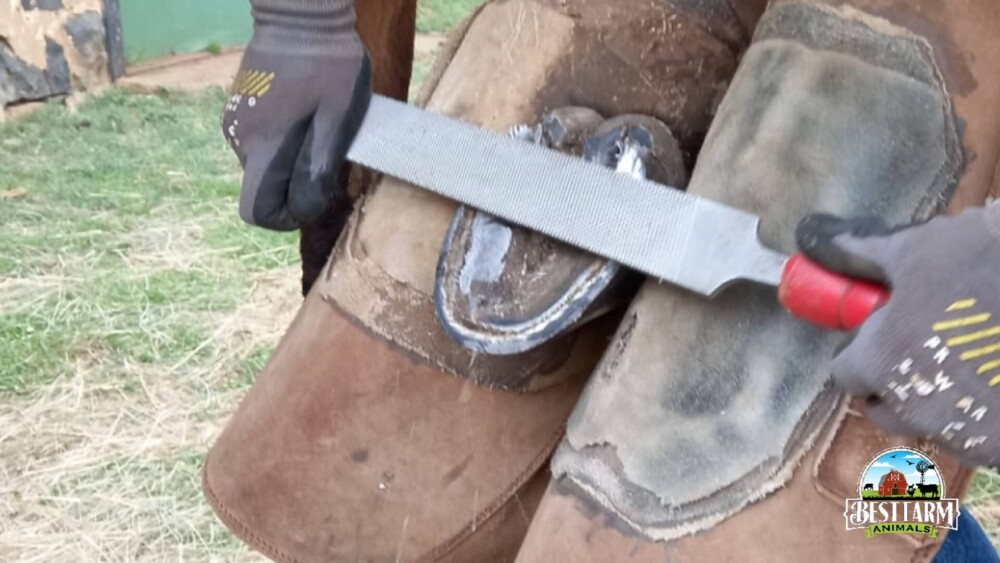
Step Six: Rasping the Bottom of the Hoof
The rasp has two sides. One is coarse, and one is fine-grained. The rougher side rasps much quicker, but the tooth of the rasp tends to stick on the hoof. For beginners, the finer side will work much more manageable.
Hold the rasp with both hands. One hand is on the handle and the other guides and balances the rasp by gripping or supporting the tip. Remember: the rasp only rasps when you push it forward. It can’t rasp on the return track. This means you need to apply pressure when rasping forward and relieve pressure when the rasp returns to the start position.
Be careful to only apply pressure on the rasp where you want to remove more nail. If you rasp with equal pressure across both sections of nail, you will cause the hoof nail to be convex. This will mean your horse will only have a heel and toe section to walk on, which is very bad.
Rasp the left side of the nail on its own, then the toe, and then the right side of the nail. Finally, finish both heels, ensuring they are level. Use the rasp to level out the rough outside edge of the hoof nail. This is like buffing your nail when you have cut it to make sure it doesn’t hook on anything.
Step Seven: Re-Reassessing the Hoof
When you have trimmed your horse’s hoof-like above, you are ready to “dress” or shape the hoof. This means you need to check for any flares (areas where the hoof has stretched outward) or bulges (where the hoof has overgrown the horny outer layer).
Letting the horse stand squarely over their hooves, check each hoof for signs of flares and bulges, as well as any cracks or areas where the hoof may need additional rasping.
Step Eight: Shaping the Hoof
In the world of farriery, shaping the hoof is when the horse lifts their hoof onto a sturdy surface such as a metal frame or stool, allowing the farrier to rasp the sides of the hoof wall.
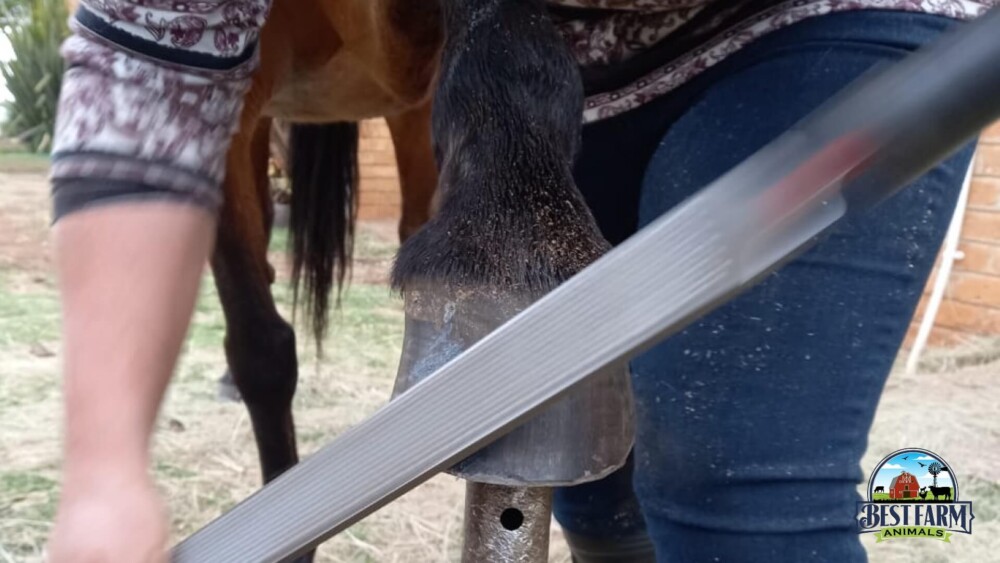
In this photo, you can see the hoof wall is slightly stretched on the inside, creating what is known as a flare. If left untreated, the hoof will continue to stretch and eventually break (usually causing serious pain) as this section becomes brittle.
Rasping the hoof removes the excess hoof wall. In the above photo, notice the concave shape of the inside edge of the hoof wall. Rasp the area until it is level with the natural growth line of the hoof.
Next, elevate the hoof onto the support and rasp the bottom edge of the nail.
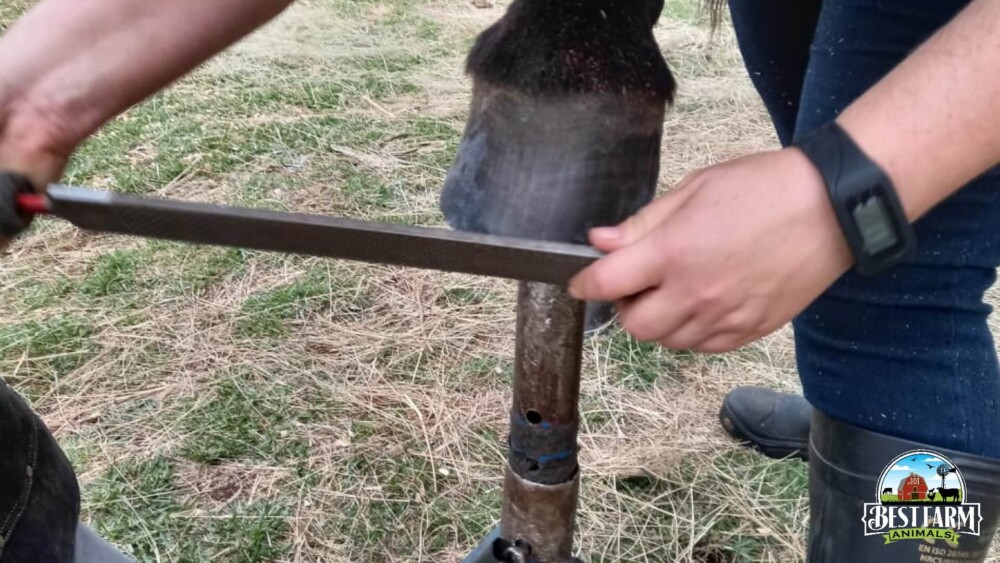
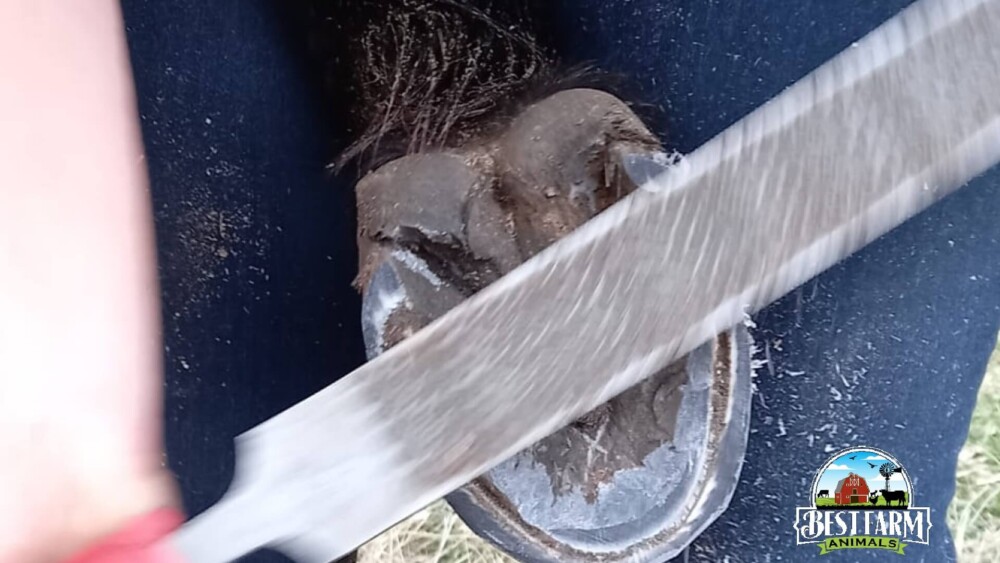
The angle of the rasp changes now, removing the sharp edges from the hoof nail. When you do this, you can expect the rasp to bounce quite a bit along the surface of the nail. Just keep practicing, and remember only to push down when you rasp forward and relieve pressure when you pull the rasp back.
In this photo, you can also see where the flare has been reduced on the hoof. This was my first hoof, so we could have taken a few more millimeters off to bring the hoof into better shape, but with hooves and trimming, less is always more.
Take off as little as you can, then take off a little more if necessary. You can always trim or rasp a little more, but you can’t glue it back on if you take off too much!
Step Nine: Repeat Three More Times
By step nine, you are going to be feeling strained and tired. And guess what—you have three more hooves to trim!
Treat each hoof as unique. Don’t do something on the other front hoof because you did it on the right leg’s hoof. Instead, evaluate each hoof on its own. Balance it according to the horse’s shoulder, the shape and heel height of that particular hoof, and the amount of nail you have present.
Horses may walk more heavily on a dominant leg, wearing the hoof away more than the other leg. This means that while one hoof may require that you nip off two millimeters of nail, the other hoof may need five millimeters.
What About Problem Hooves?
I felt pretty good after my trimming session. The next day, we were trimming my gelding, who has “slow” front hooves. This meant we had to “dump his toe” as the farrier called it, and I realized there is a HUGE amount I still don’t know about farrier work.
The moral of this is that I can trim a horse’s hooves if they are relatively standard. However, I know I need to call on my farrier for guidance and support when the horse starts off with conformation problems such as boxed hooves, pigeon toes, or overreaching.
Conclusion
While trimming my horse’s hooves was physically exhausting, it was also a real thrill. I developed a new respect for the tiny surface my horse walks on and how crucial proper hoof care is.
You can trim your horse’s hooves on your own. It requires the basic skills and knowledge shared here and the wisdom to know when you’re not sure about something. This is when you ask for help.
Most farriers are happy to help a new horse owner learn the basics of a trim. It doesn’t mean you will never use their services again, and by teaching you a little about trimming hooves, they can help empower you to act if your horse comes in from the paddock with a large section of hoof wall broken off.
I encourage you to discuss the basics of trimming with your farrier and ask them to supervise you for a bit while you try your hand at trimming your own horse’s hooves.
Check out why a broken leg is a death sentence and when it isn’t!
My Favorite Equine Resources For Horses and Donkeys
This list contains affiliate products. Affiliate products do not cost more but helps to support BestFarmAnimals and our goal to provide farm animal owners with accurate and helpful information.
Squeaky Chicken Toy is hilarious to watch and the horses love it! It’s not super tough so keep it away from dogs.
Dewormer with Ivermectin: I use this for my horses and my goats. Duvet makes a great dewormer. I switch between the Ivermectin one and one like this one so the worms don’t get immune to it.
Manna Pro Apple Flavored Nuggets are a delicious smelling treat that my horses go crazy over.
Equinity Amino Acid Supplement for Horses makes a big difference for any horse that’s struggling with arthritis, hoof issues, or just generally. It’s great for older horses who can’t absorb all the nutrients in their food as well!
Manna Pro Weight Accelerator helps older horses gain weight and stay healthier! This was especially helpful when one of my older horses lost weight over the winter and helped her regain her weight over the summer!
Farnam Fly Control goes on the horse or donkey and will keep the flies off your sweet pet. It makes horses way more comfortable and will keep sores from getting infected as well.
Wound Kote protects sores and wounds. It acts as an antiseptic and helps wounds heal faster. It works on both my horses and goats.